At Mous, we want to help provide total protection for people’s most loved tech devices, and protection doesn’t end with a case: you need a screen protector. In this guide we’ll explain step-by-step how to apply each of our screen protectors so that you can have the best possible protection for your device.
How do I apply a screen protector?
To apply a screen protector of any kind, start in a clean, bright room with a flat surface so that you can hold your device and screen protector with both hands, and make sure you know what to do before you start. Our screen protectors can only be applied once. We make three different types of screen protectors - TPU, tempered glass and hybrid glass screen protectors. Screen protector application for each one is slightly different, and some also vary by phone model. We’ve broken the instructions out by type, so scroll down to find the right one for you.
Apple Watch screen protector
Place your Apple Watch on a flat, clean surface so that you can hold the screen protector with two hands before you get going.
-
Turn your black applicator upside down and gently push your Apple Watch in, face down, until you feel it slot into place.
- Turn the device over and then carefully wipe your Apple Watch screen with the cleaning wipe provided, then take the microfibre cloth and dry it thoroughly.
-
Next, use the dust sticker to remove any dust and dirt from the screen.
-
Now slowly peel away the plastic tab on the reverse side of the screen protector to expose the adhesive surface. Make sure not to touch this side to avoid leaving any grease spots or tiny particles.
- Carefully slot each side of the screen protector, one at a time, under the ridges of the applicator. You’ll see it start to stick, so as fluidly as possible, push it all down against the screen of the watch.
-
Get rid of any air bubbles by pushing them to the edge of the screen with the bubble stick.
- Gently apply pressure to the face of your Apple Watch to push it out of the applicator.
And there you have it - your screen protector should be successfully applied to the face of your Apple Watch. Remember, the screen protector might get scuffed and marked but your actual screen won’t - no scratches, no grease marks, no trouble.
Tempered glass iPad screen protector
Place your iPad on a flat, clean surface so that you can hold the screen protector with two hands before you get going.
- Wipe the screen with the cleaning wipe and dry it with the microfibre cloth.
- Next, use the dust sticker to dab off any remaining dust on your screen.
- Carefully peel off label 3 to expose the adhesive side of your screen protector.
- Wake your screen to align and apply the exposed, sticky side of your screen protector to your iPad. You won’t be able to reapply the screen protector so working carefully, use one swift motion.
- Next, wrap your anti-bubble card in the microfibre cloth and use it to push out any bubbles. Don’t be afraid to push a little harder than you think - your screen is well protected.
And that’s that - your iPad screen protector is applied and your screen is protected. Don’t forget that the screen protector is there to protect the screen itself, so it may get a little damaged or even crack. This is perfectly normal, and it means it’s done its job.
TPU screen protectors
Whichever phone model you have, the instructions for our TPU screen protectors are the same.
Place your phone on a flat, clean surface so that you can hold the screen protector with two hands before you get going.
- Wipe the screen with the cleaning wipe and dry it with the microfibre cloth
- Next, use the dust sticker to dab off any remaining dust on your screen
- Now peel off the label 3 film to expose the sticky side of your screen protector.
- Wake your screen to align and apply the exposed, sticky side of your screen protector to the phone. You won’t be able to reapply the screen protector so working carefully, use one swift motion.
- Next, wrap your anti-bubble card in the microfibre cloth and use it to push out any bubbles. Don’t be afraid to push a little harder than you think - your screen is well protected.
- Finally, holding the screen protector down with one finger, carefully peel off the label 4 film to expose the TPU surface. We recommend waiting a minute or two before you put your case back on to allow it to really stick.
And that’s that - your TPU Screen Protector is applied and your screen is protected. Don’t forget that the screen protector is there to protect the screen itself, so it may get a little scratched. This is perfectly normal, and it means it’s doing its job.
Tempered glass phone screen protectors
Whether you have an iPhone or a Google Pixel, the instructions for our tempered glass screen protectors are the same.
Place your phone on a flat, clean surface so that you can hold the screen protector with two hands before you get going.
- Wipe the screen with the cleaning wipe and dry it with the microfibre cloth.
- Next, use the dust sticker to dab off any remaining dust on your screen.
- Using the tab at the top, gently remove the white sheet to expose the adhesive side of your screen protector.
- Wake your screen to align and apply the exposed, sticky side of your screen protector to the phone. You won’t be able to reapply the screen protector so working carefully, use one swift motion.
- Next, wrap your anti-bubble card in the microfibre cloth and use it to push out any bubbles. Don’t be afraid to push a little harder than you think - your screen is well protected.
And that’s that - your Tempered Glass Screen Protector is applied and your screen is protected. Don’t forget that the screen protector is there to protect the screen itself, so it may get a little damaged or even crack. This is perfectly normal, and it means it’s done its job.
Hybrid glass screen protector - S20, S20 Plus, S20 Ultra, Note 20, Note 20 Ultra
There are two different application methods for our hybrid glass screen protectors, so make sure you’re following the right instructions for your phone model. The following set is for Samsung S20, S20 Plus, S20 Ultra, Note 20 and Note 20 Ultra.
Place your phone on a flat, clean surface so that you can hold the screen protector with two hands before you get going.
- Start by placing your phone carefully into our handy applicator bed.
- Wipe the screen with the cleaning wipe and dry it with the microfibre cloth.
- Next, use the dust sticker to dab off any remaining dust on your screen.
- The side with label 3 should face your phone screen. The notches at the top and bottom of the screen protector align with the notches on the applicator bed.
- Peel off label 3, and in one fluid motion stick the screen protector down.
- Now carefully remove your phone from the applicator bed.
- Holding down the screen protector, carefully peel off the top label using the screen protector tabs.
- Wrap the anti-bubble card in the microfibre cloth to prevent scratches and firmly push out any bubbles by running the card towards the bubble and then towards the edge of the screen. Don’t be afraid of a little pressure - your screen is well protected.
- Once you’ve applied your screen protector, you’ll need to recalibrate your finger scanner. You can do this in the settings of your phone.
And that’s that - your Hybrid Glass Screen Protector is applied and your screen is protected. Don’t forget that the screen protector is there to protect the screen itself, so it may get a little scratched. This is perfectly normal, and it means it’s doing its job.
Hybrid glass screen protector - iPhone, Pixel, S20 FE, S21 FE
There are two different application methods for our hybrid glass screen protectors, so make sure you’re following the right instructions for your phone model. The following set is for all iPhones, all Google Pixels, Samsung S20 FE and S21 FE.
Place your phone on a flat, clean surface so that you can hold the screen protector with two hands before you get going.
- First, insert the applicator into your phone’s charging port (Lightning side for iPhone and USB-C for Android) and take off the applicator cover at the bottom.
- Wipe the screen with the cleaning wipe and dry it with the microfibre cloth.
- Next, use the dust sticker to dab off any remaining dust on your screen.
- Now align the screen protector using the guides on the applicator, place it down flat, and put the applicator cover back on.
- Peel label 3 away from the screen protector, exposing the adhesive surface and use a finger to push the screen protector along the surface of your screen, starting at the applicator and working your way upwards. You won’t be able to reapply the screen protector so working carefully, use one swift motion.
- Holding down the screen protector, carefully peel off label 4, exposing the smooth surface of your screen protector and remove the applicator.
- Wrap the anti-bubble card in the microfibre cloth to prevent scratches and firmly push out any bubbles by running the card towards the bubble and then towards the edge of the screen. Don’t be afraid of a little pressure - your screen is well protected.
And that’s that - your Hybrid Glass Screen Protector is applied and your screen is protected. Don’t forget that the screen protector is there to protect the screen itself, so it may get a little scratched. This is perfectly normal, and it means it’s doing its job.
Screen protector application complete
Hopefully you now have a perfectly applied screen protector. If you’re still not sure what to do or have any other questions, head over to our FAQs. Having a high quality screen protector, alongside an impact-absorbing case, is essential to looking after your phone or iPad. If you haven’t purchased one yet, you can get your Mous screen protector here.
It’s also really important to purchase the right screen protector for you because each type works slightly differently. We’ve written a guide to explain the differences and help you make the right choice. Read it here.

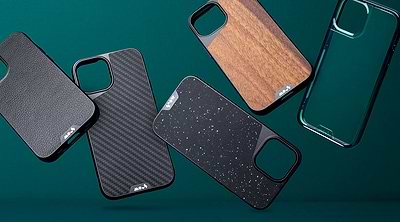
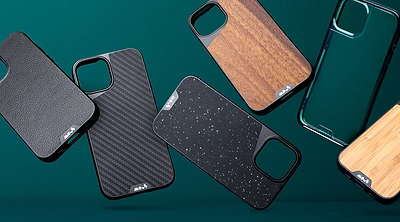
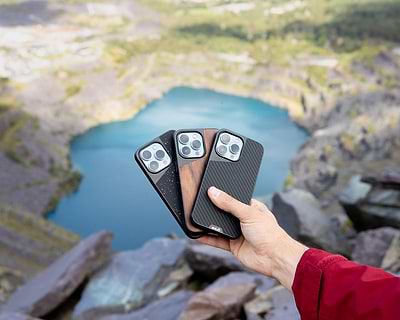
We are Mous
Mous's mission began when we saw an uninspiring marketplace. All the phone cases were either pretty and flimsy or protective but ugly. We were inspired to do better. We started making cases which are highly protective, extremely functional and seriously stylish and we made sure they worked by throwing them off 45ft cranes and helicopters. Now we make a whole range of tech accessories designed to enhance your everyday tech, everyday. Check out our iPad cases, wireless chargers, and range of MagSafe compatible products.